Since I bought my plane at the end of September, I’ve been hard at work on a few maintenance items and upgrades. I’ve only flown a handful of times since my flight home, and each time has been in the local area. This is partly due to being grounded for a couple of the issues I’ll get into, but primarily because I’ve been busy working on the upgrades before I take the plane on any bigger trips. So, here’s the stuff I’ve been working on.
After one of the first flights I took the plane on since getting it home, the next time I came out to the plane I arrived to a puddle of brake fluid on the ground.
While I’m not certain what actually caused the failure, my hypothesis is that it was related to excessive brake heat during my last landing. I’m still perfecting my landing technique, and I’m still crossing the threshold about 10 kts faster than I’d like. Additionally, on the flight before I discovered the issue, I was reasonably hard on the brakes as I was testing my landing distance.
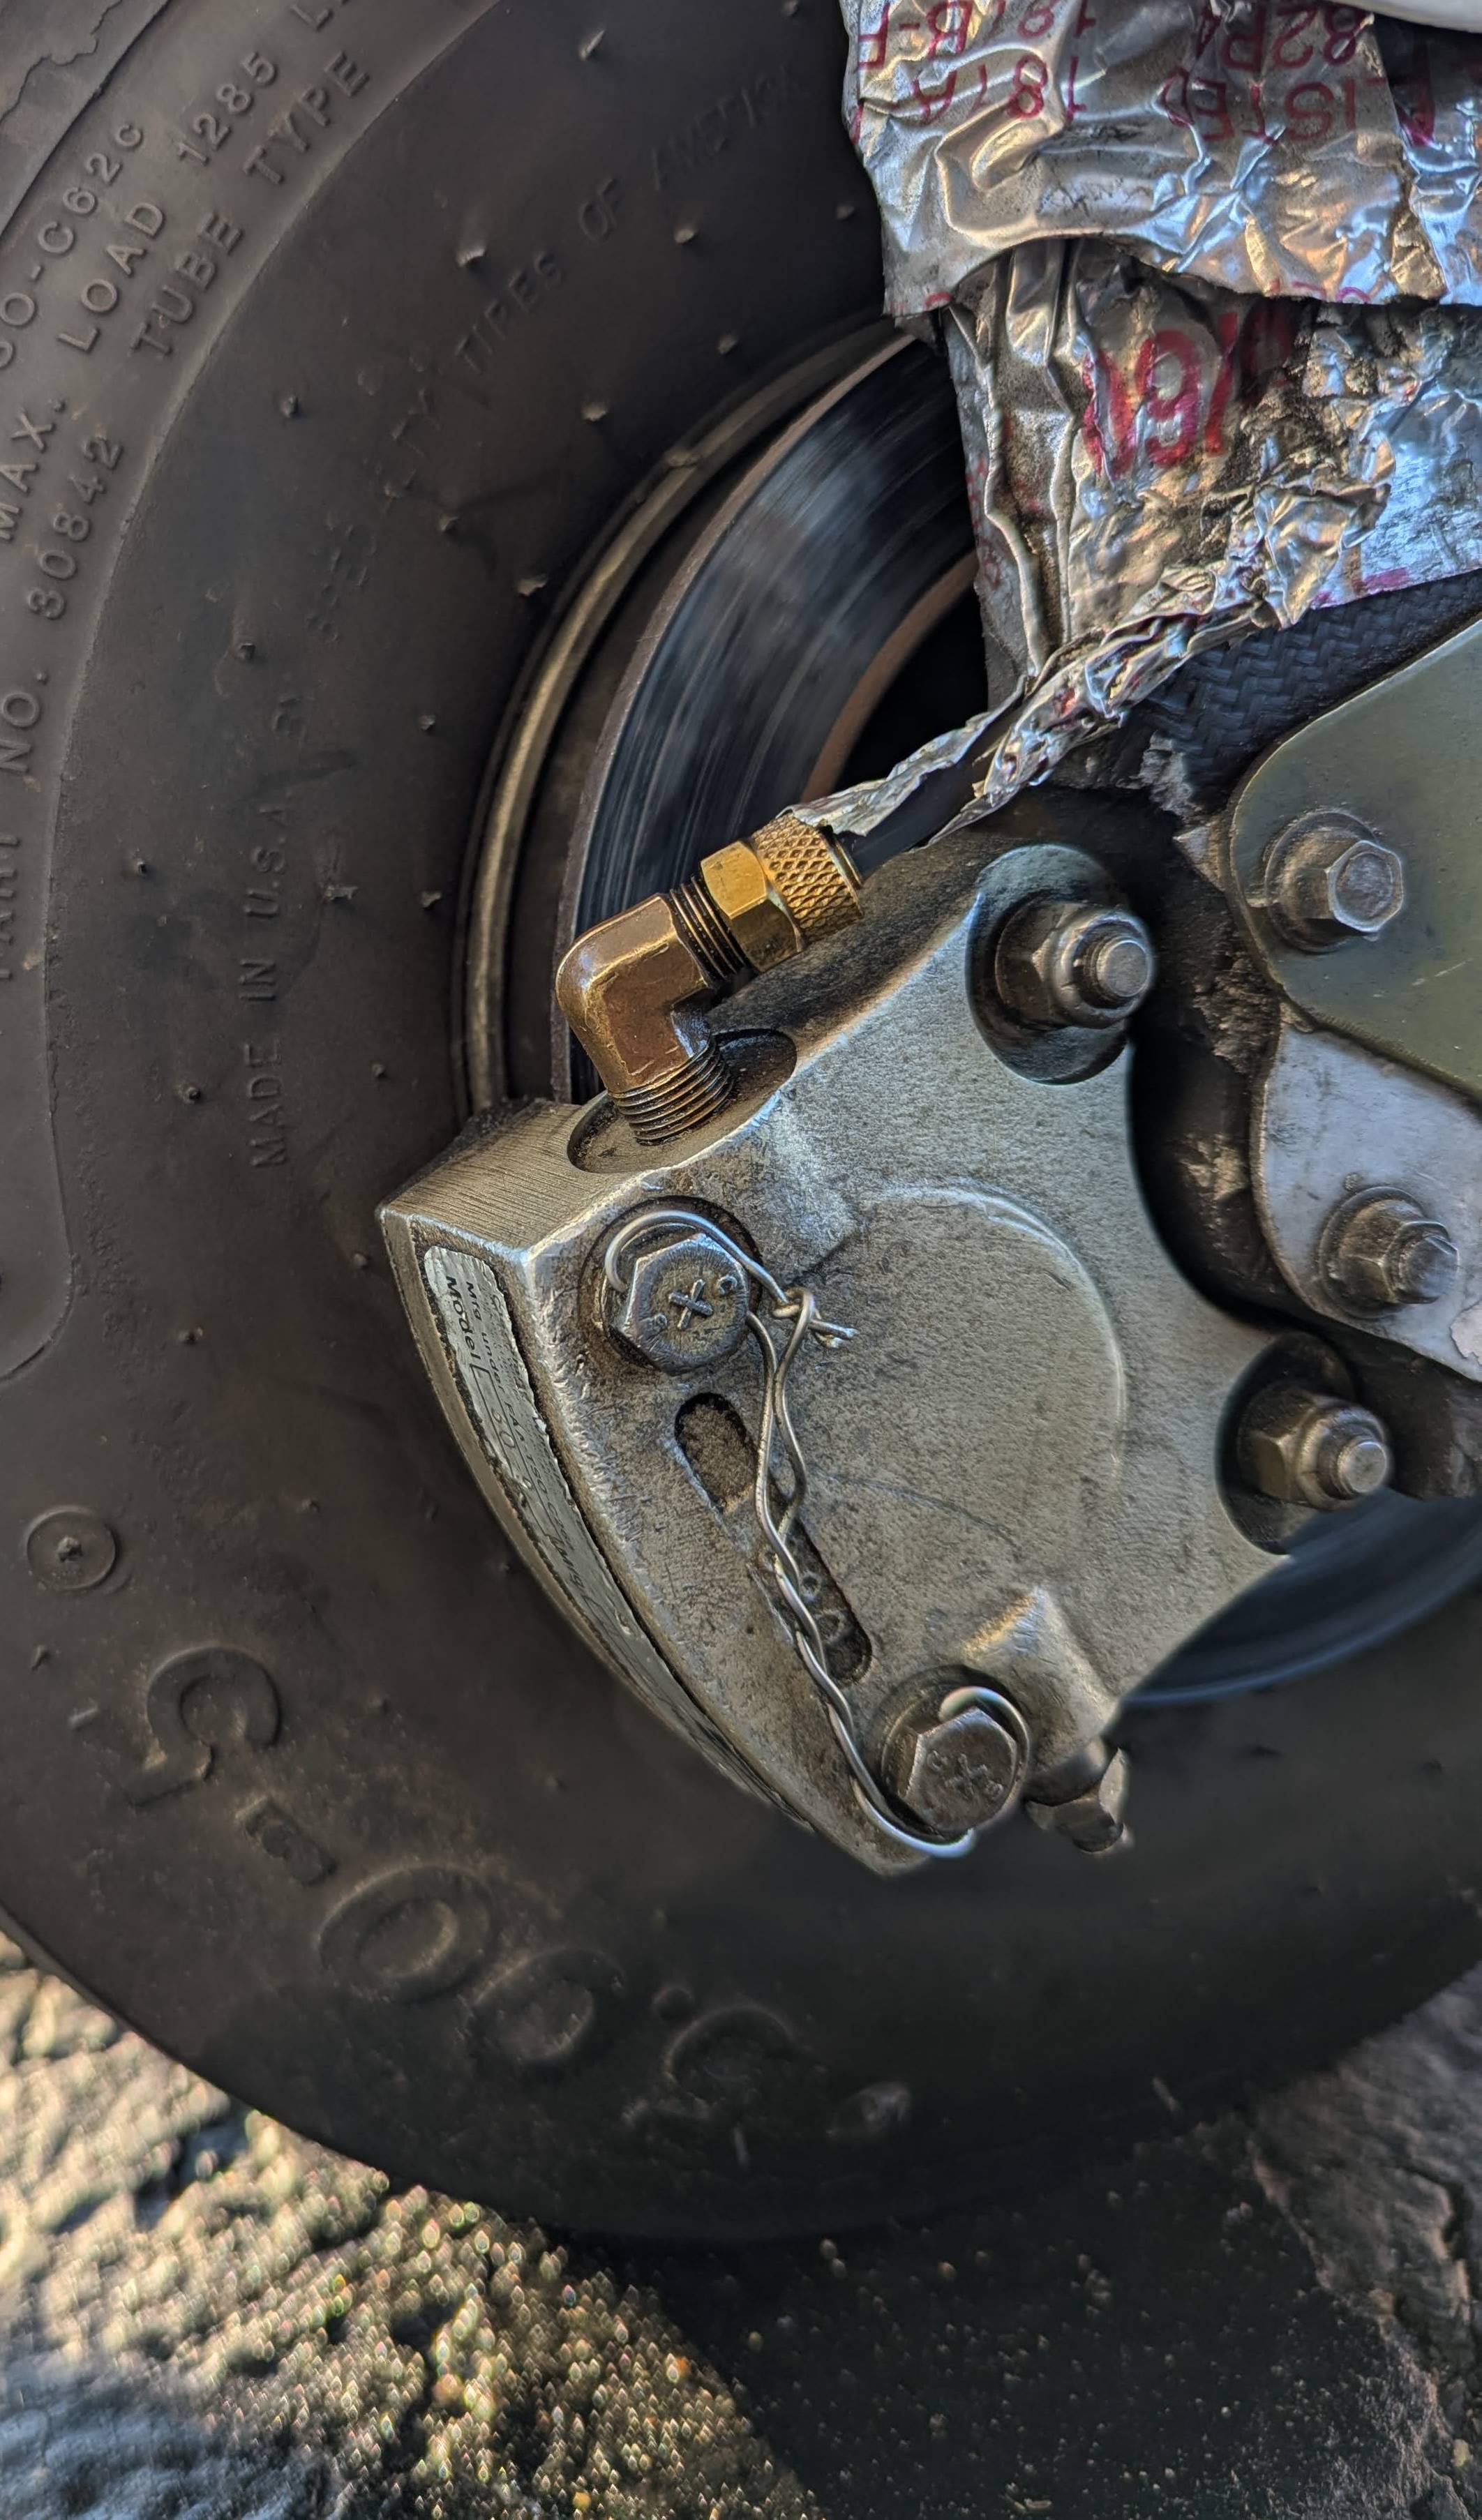
The old brakes used nylaflow tubing all the way to the brake caliper per the plans. While lightweight and easy to work with, I don’t think this type of tubing provides the best heat resistance. Additionally, the heat shielding that was present was not in the best shape.
I decided to make a minor upgrade and run stainless steel braided PTFE tubing for the last 6” to the caliper. The nylaflow tubing is fiberglassed into the landing gear through a small channel, so it would not be easily possible to run SS tubing the whole way, nor is it probably necessary.
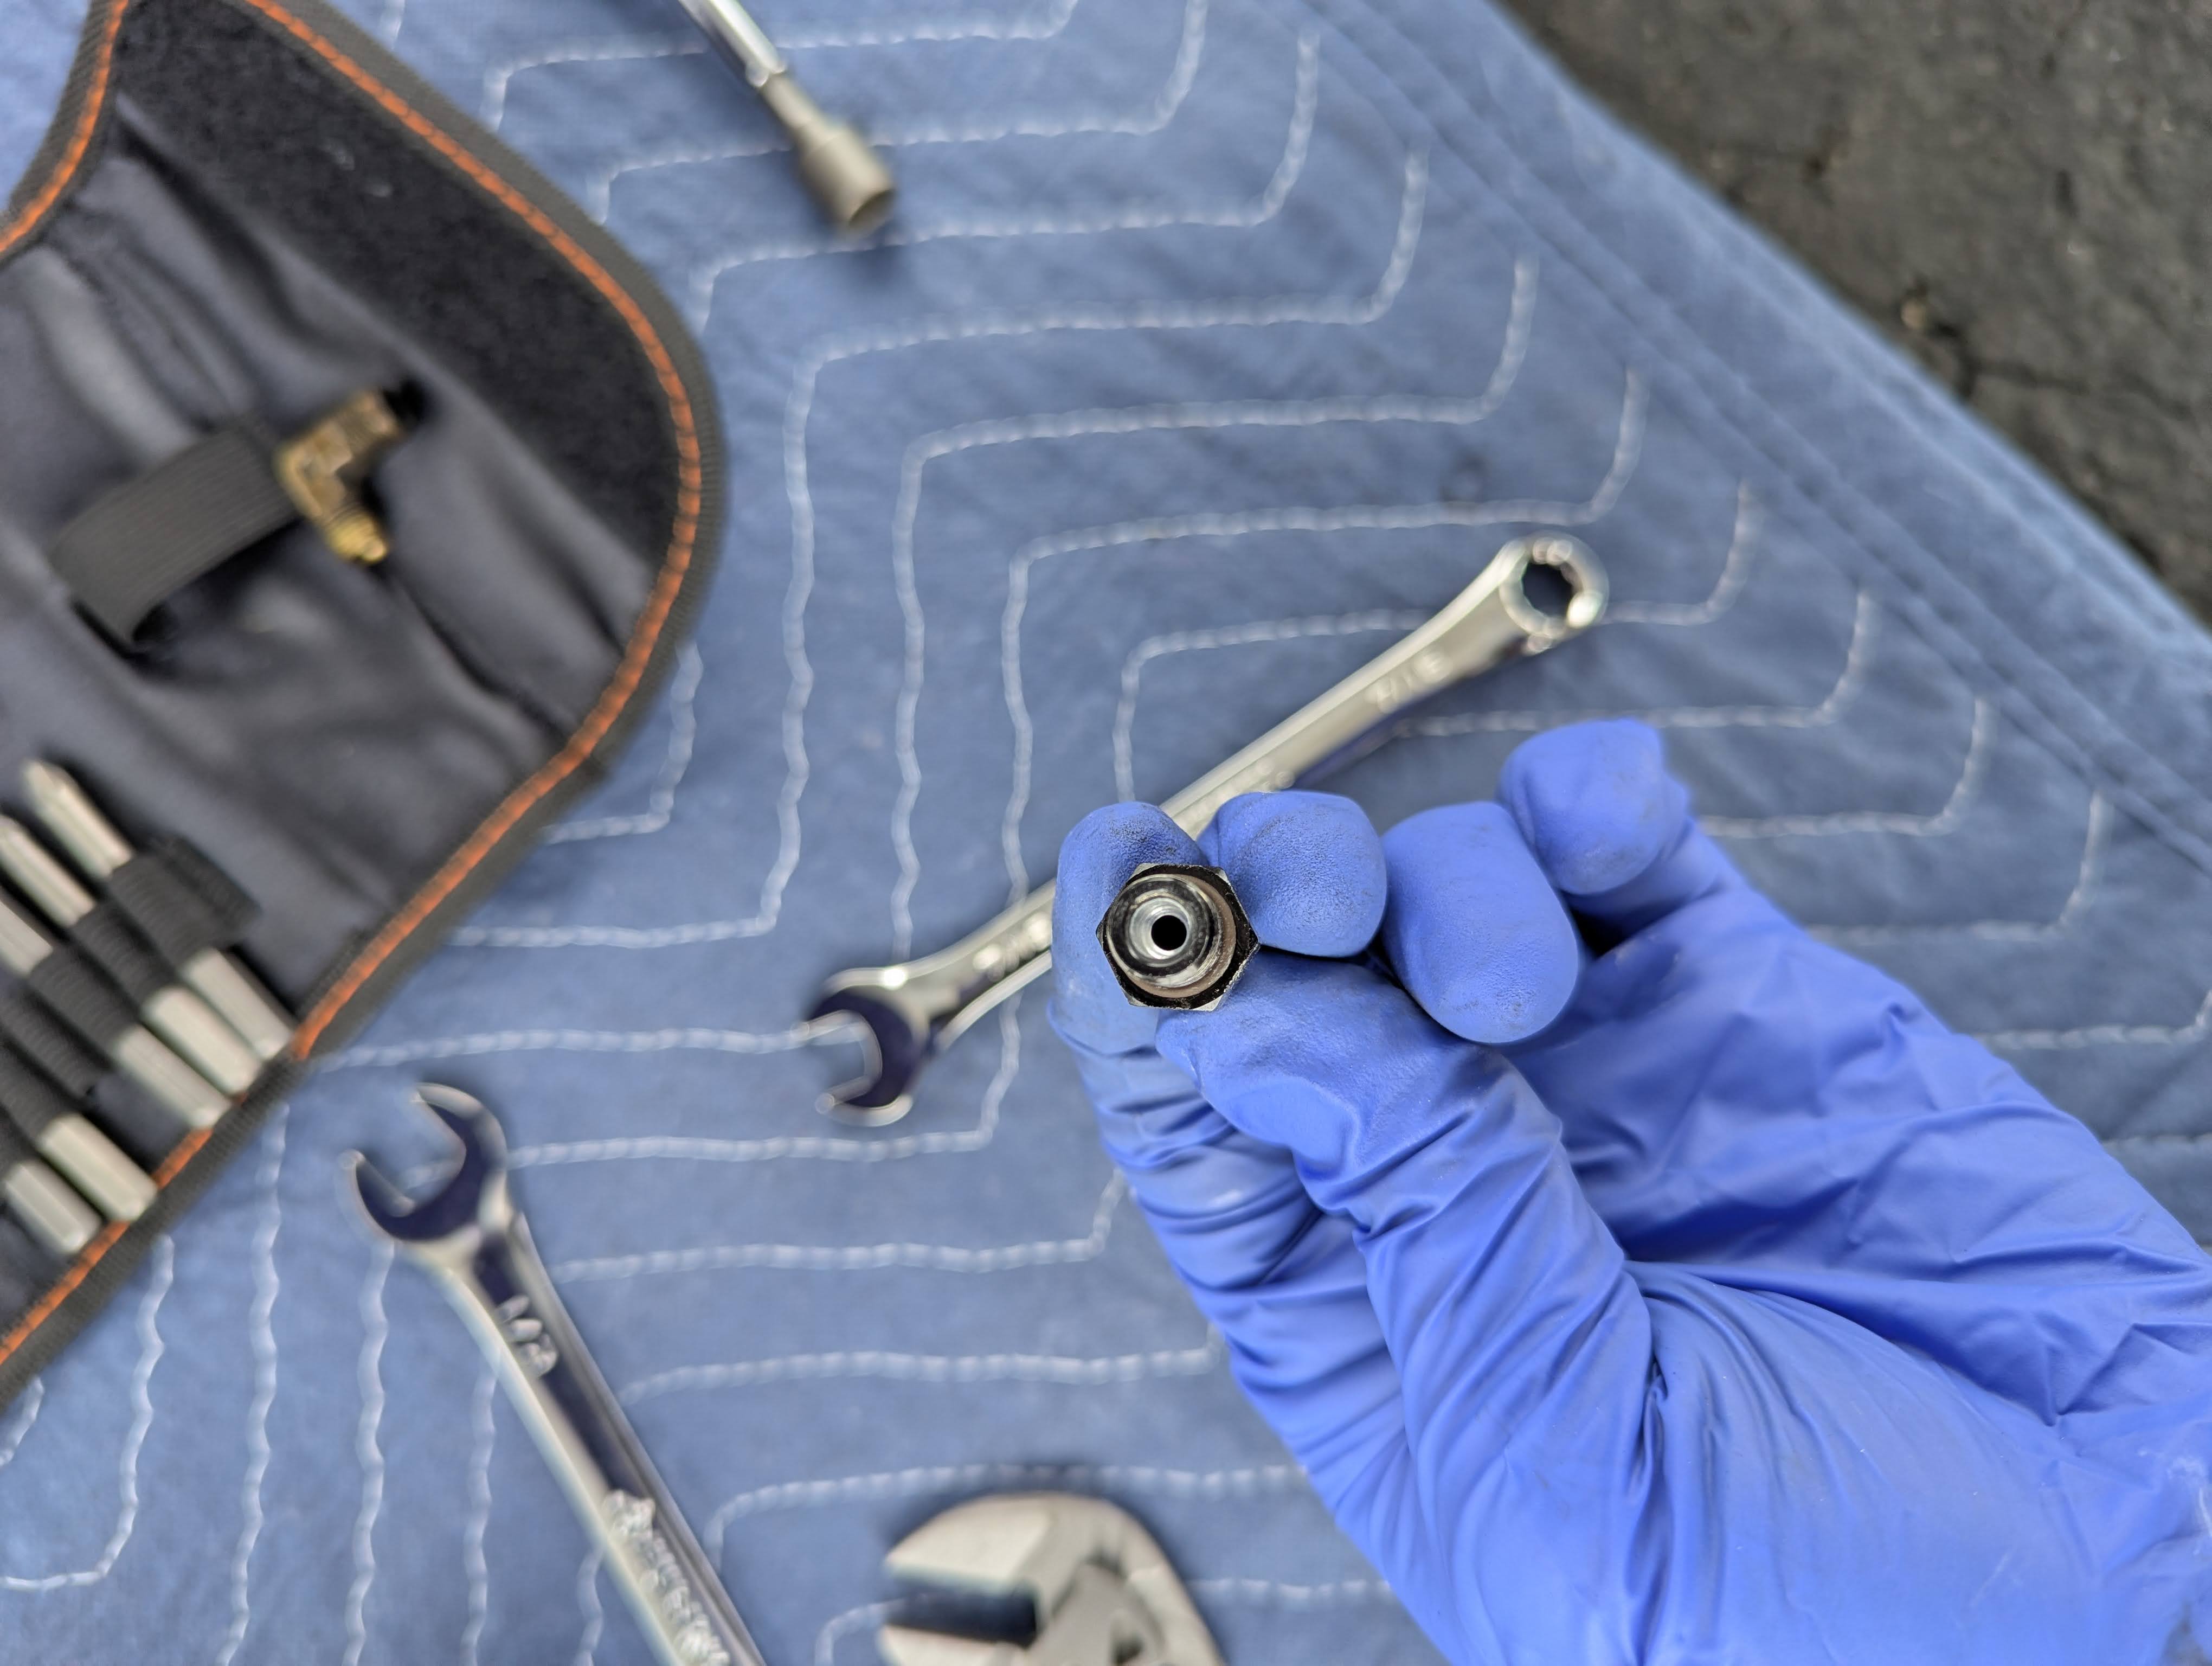
It took a few tries to figure out the right fittings I would need to adapt the old nylaflow lines to the new SS lines. I ended up with a new 1/8” NPT to AN3 right angle fitting to connect the SS line to the caliper. The SS lines use hose ends to go from the SS PTFE to a female AN3. To connect the SS to the nylaflow, I used a male AN3 to ORB3 coupling. I drilled out the ORB3 side to fit the nylaflow line like a brass nylaflow fitting would work, and then I screwed the brass AN3 nylaflow fitting onto the ORB3 side.
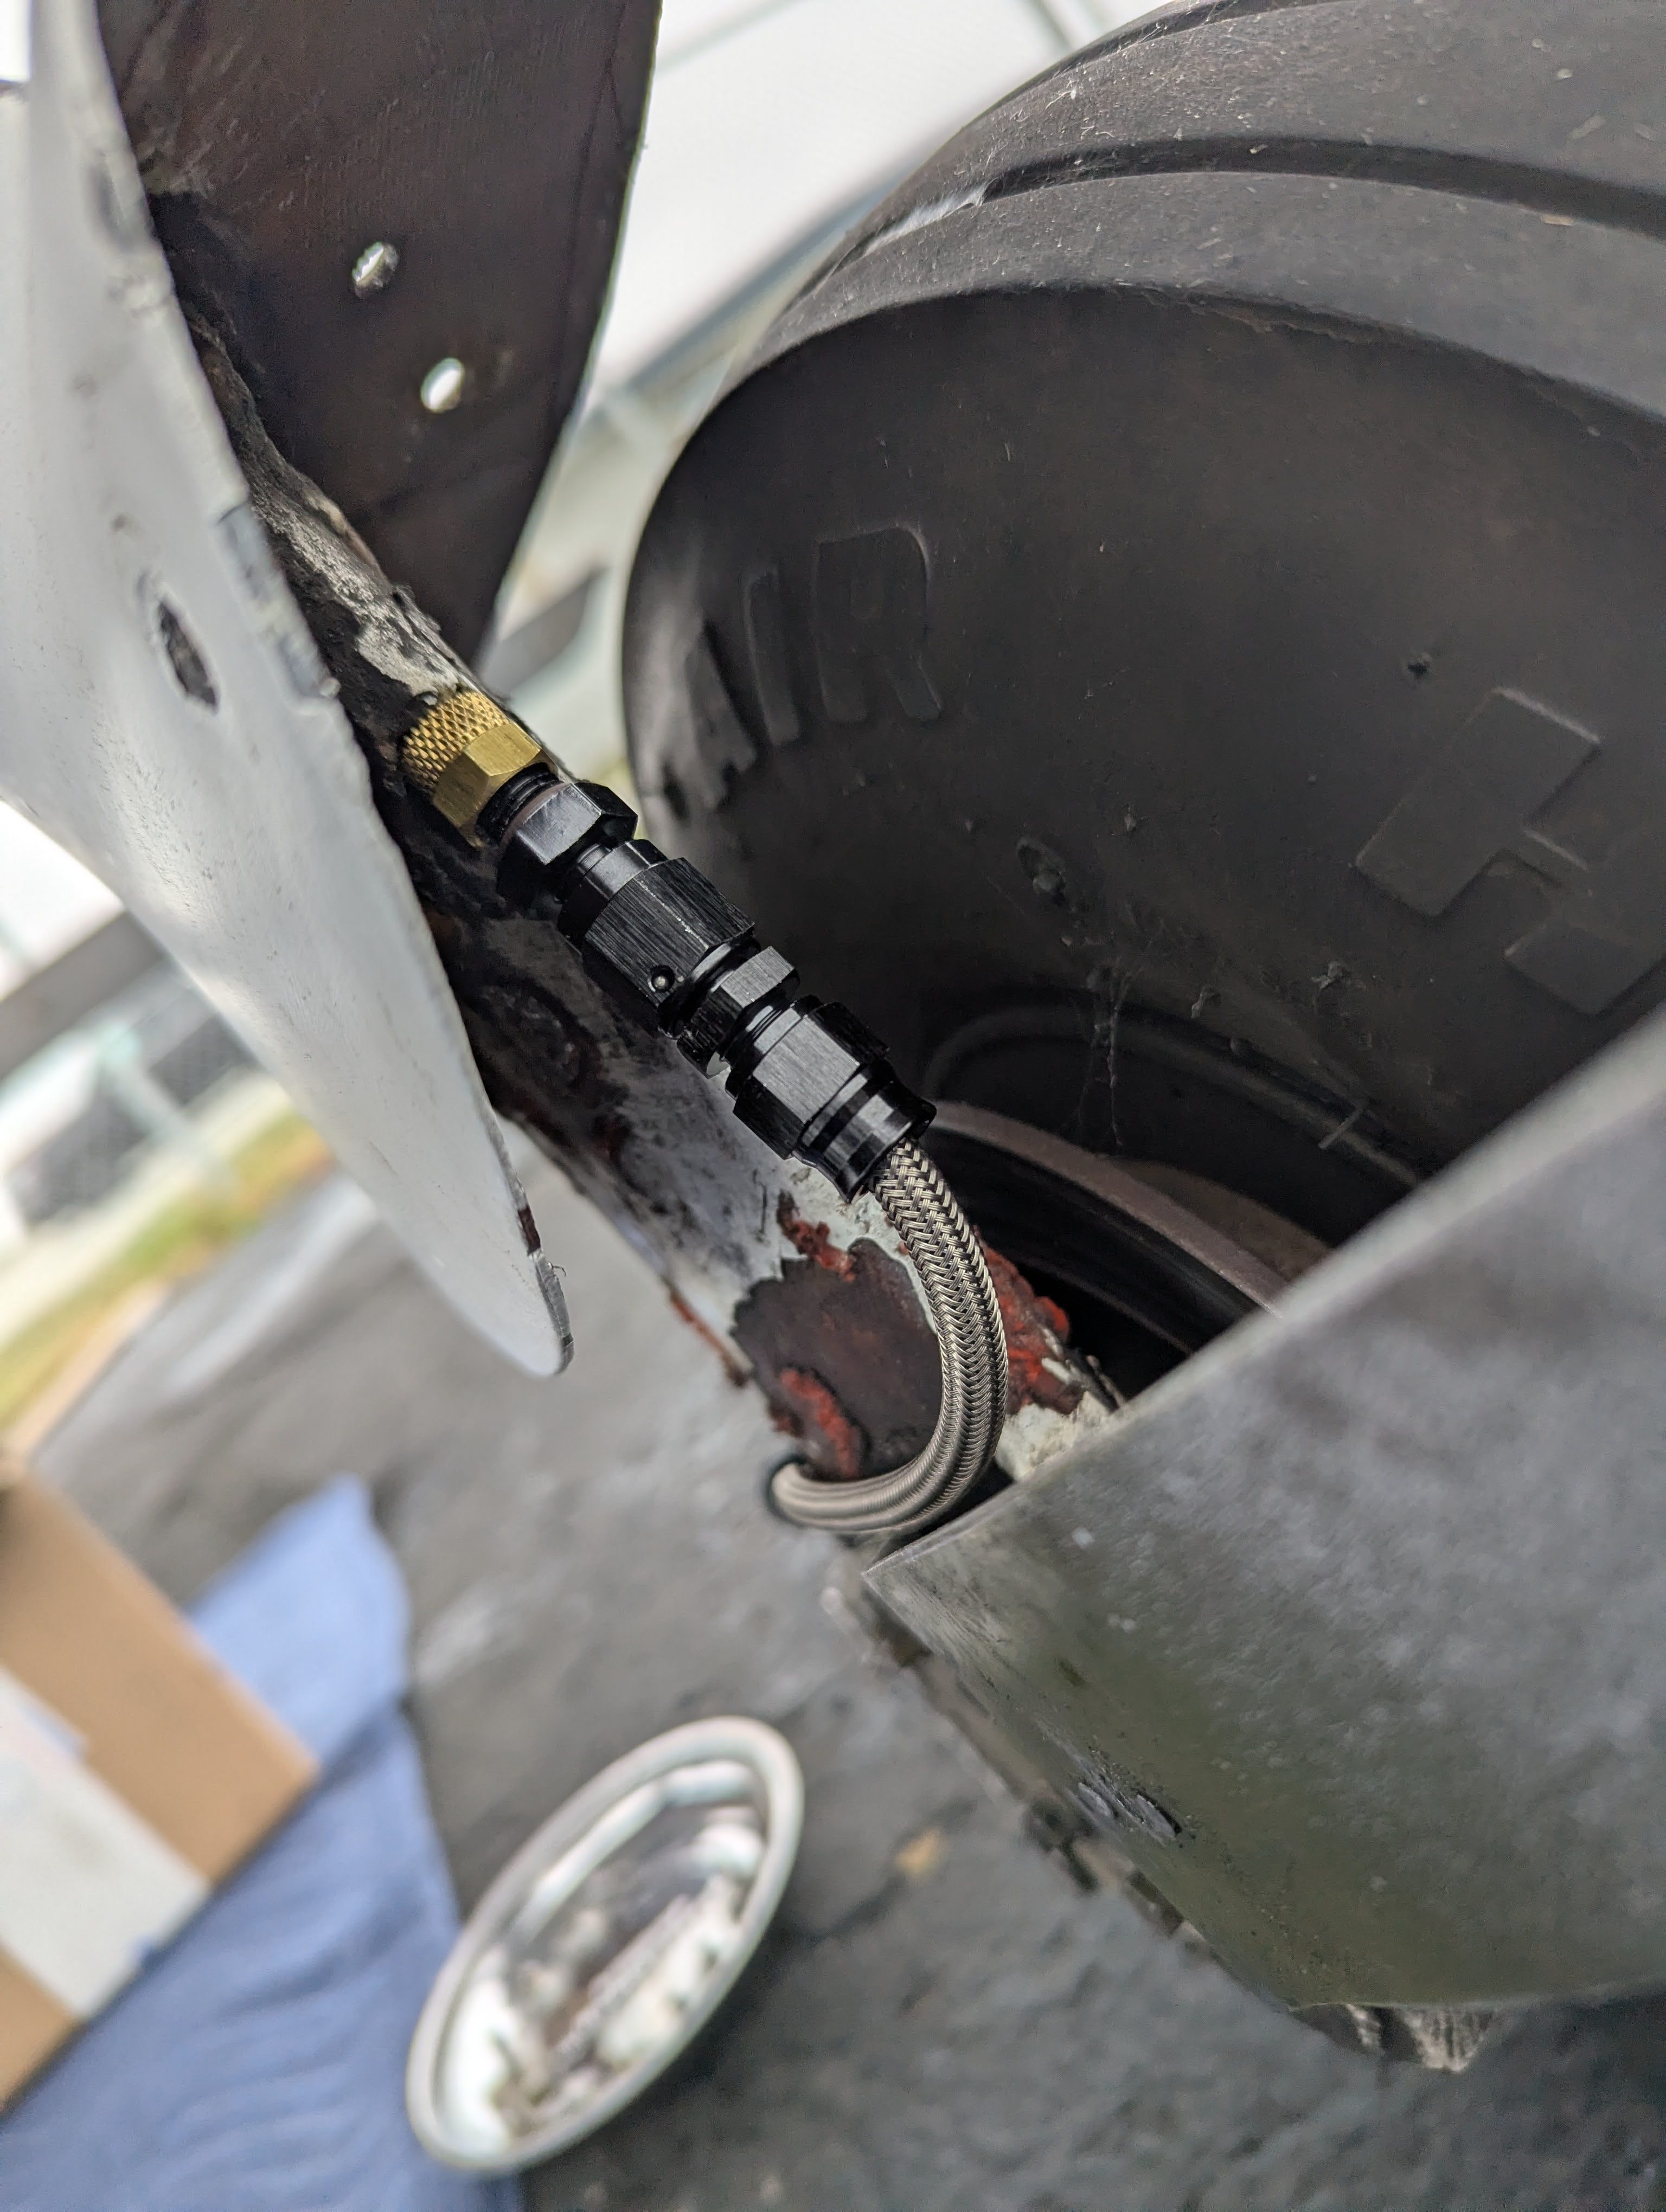
After each side was done, I bled the brakes and added new DOT-5 fluid. Then I ensured each side was leak free by depressing the brakes to the stops and cycling them multiple times. After I was satisfied, I put the wheel pants back on and taxi tested as a final assurance before going flying again.
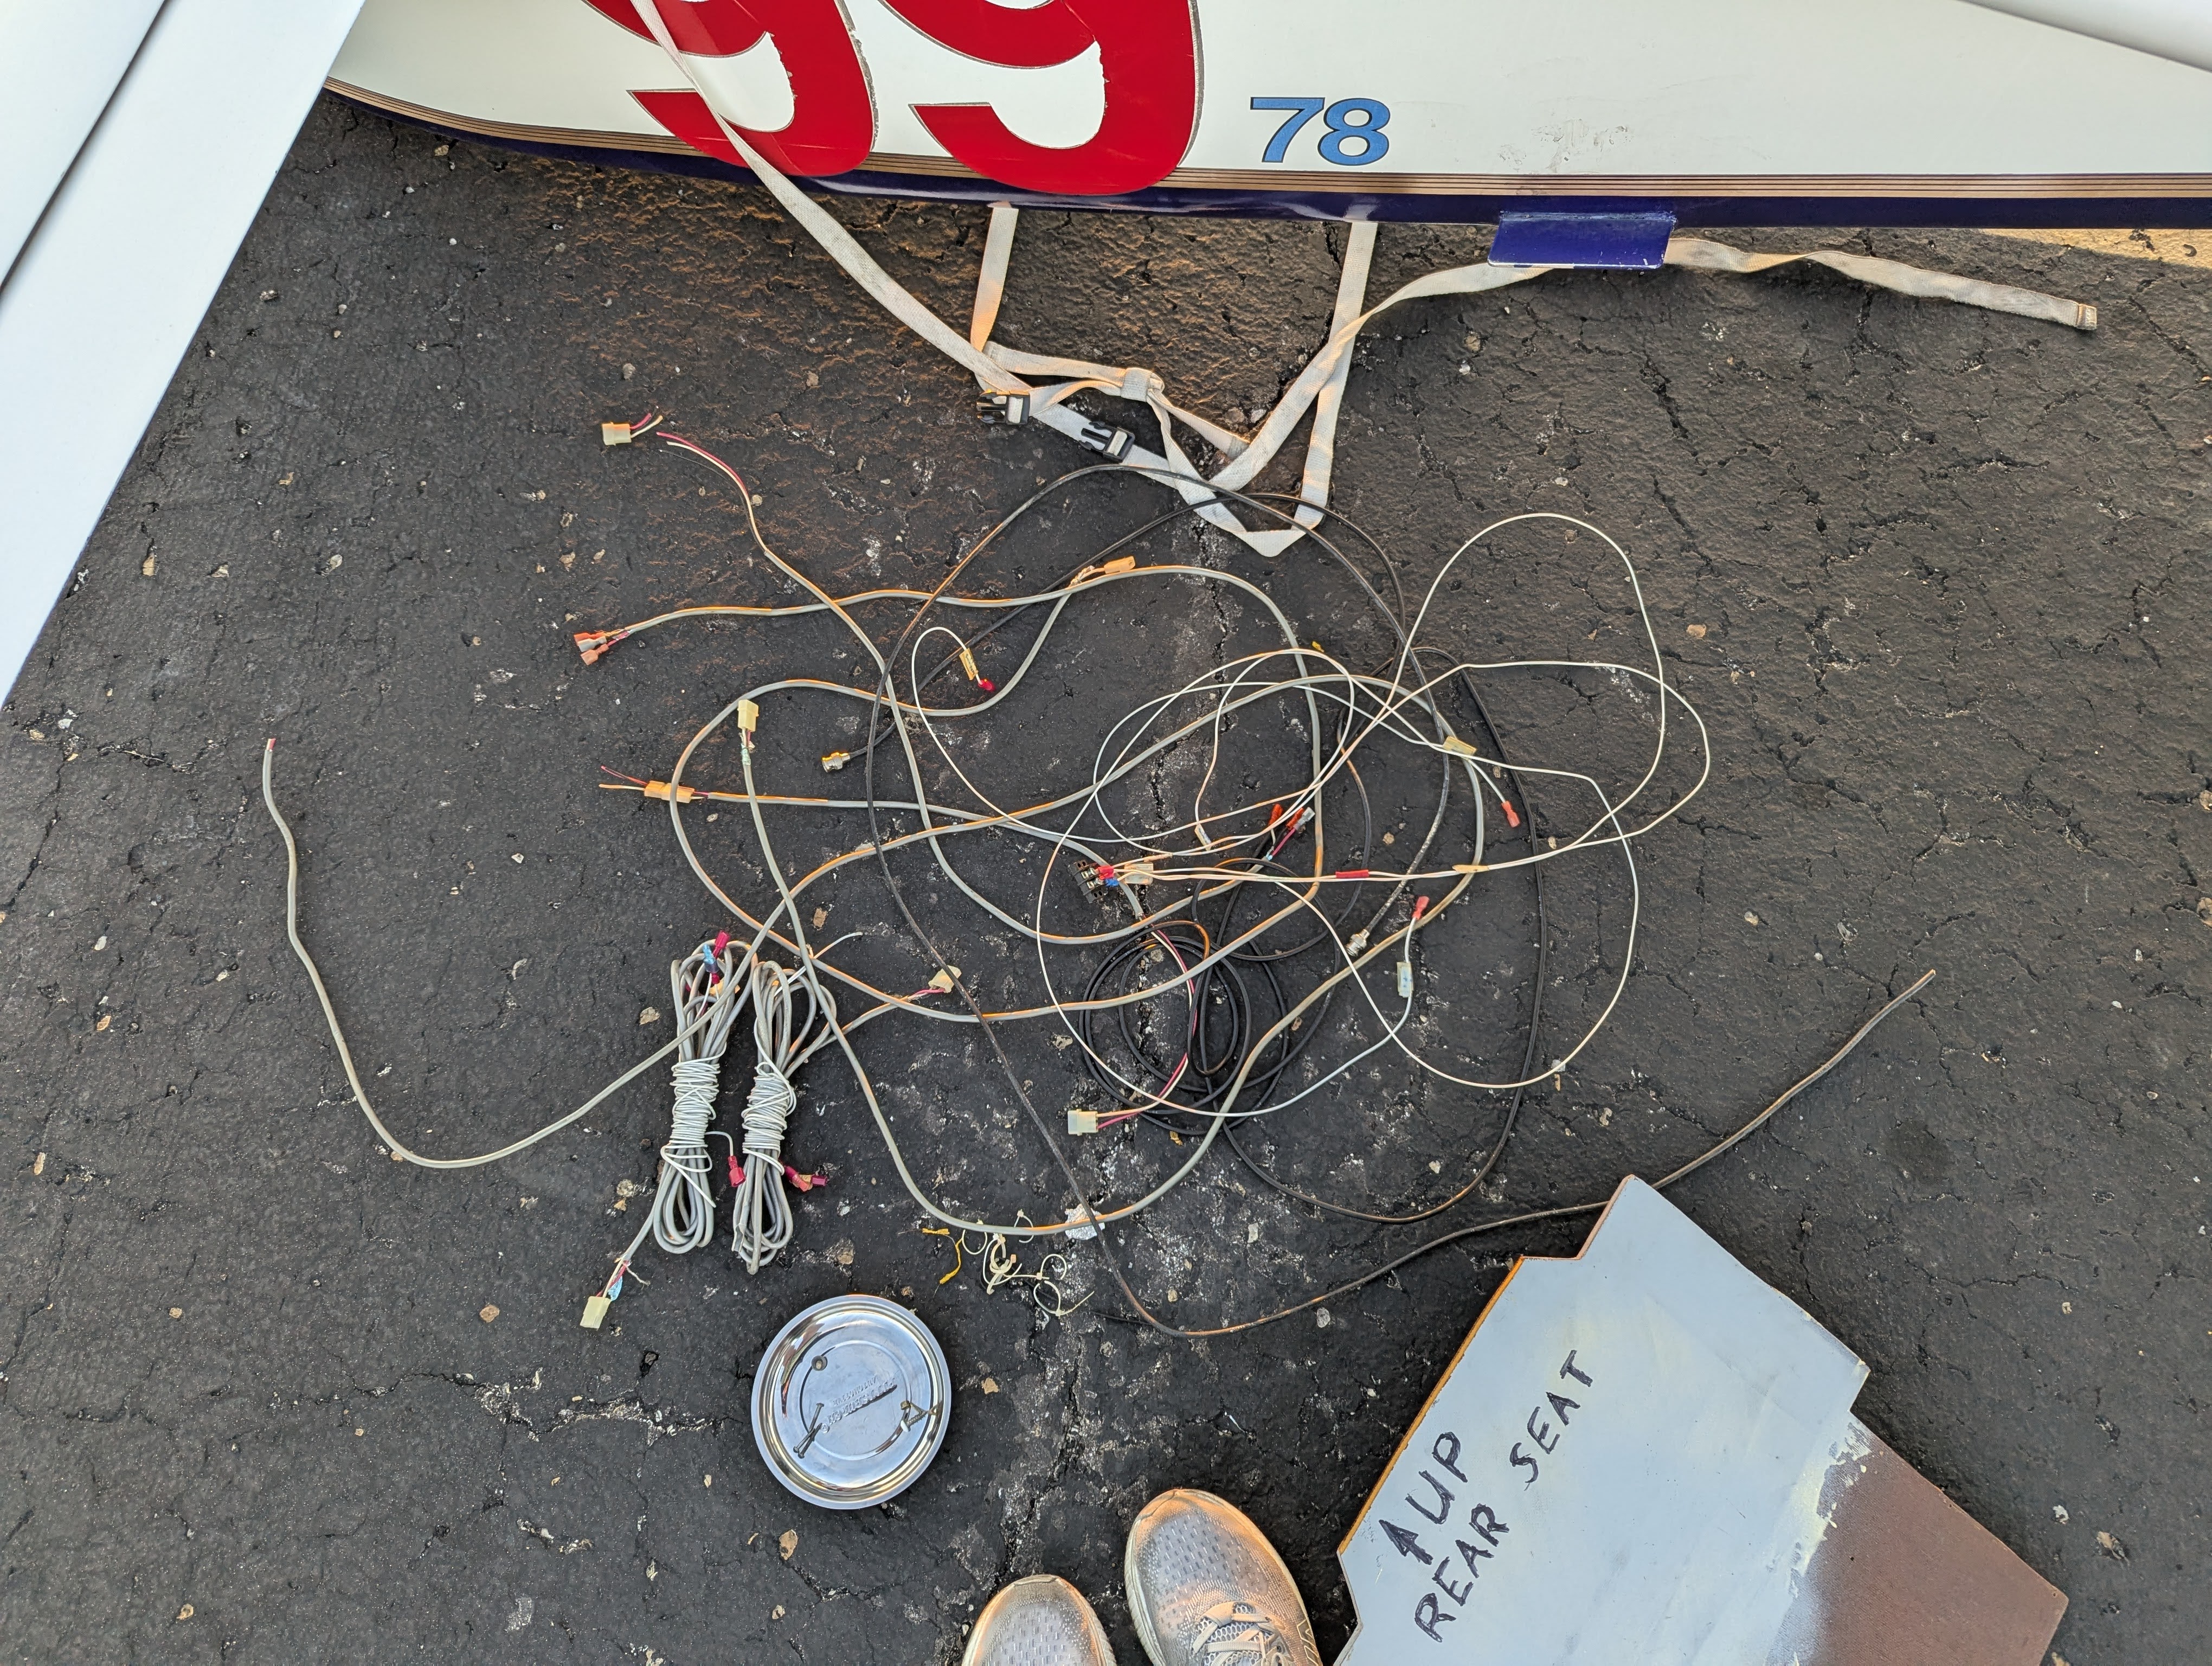
The next project I undertook was an exterior lighting upgrade. My previous nav, strobe, and position lights were Whelen A600s which took a beefy strobe power pack to drive power to the strobe flash tubes. In addition to some unshielded wire, this resulted in some audible noise on the intercom. I had also noticed after my last flight that some of the bulbs had gone out which effectively grounded me since anticollision lights are required to be used if installed (14 CFR 91.209(b)).
So, given that replacing the burned out bulbs was almost as expensive as brand new LEDs (airplane math), I decided an upgrade was a good choice. I went with Aveo LEDs that exceed the performance requirements of TSO C30c and C96a. This meant I could remove the power pack, lower the current requirements, and replace the old wiring with better shielded wiring. I hoped to come out of this upgrade with reduced or no intercom noise, and with brighter, more efficient LEDs.
This ended up being a project and a half since chasing new wire through the wing conduits was quite difficult, even though I tried to pull it through using the old wire. In order to avoid help maintenance induced failures, I opted to not remove the wings and instead used a combination of pulling the new wire through with the old wire, a drain snake, and a borescope with a hook on the end to fish the new wire through the wing conduit. This took multiple hours of patient manipulating of tools in a tight space, but eventually I was able to get the wire runs completed.
The wire I removed was a lower gauge and had more excess than necessary. All together I removed just under 5 lbs of wire, but this also included a spare coax cable to the com antenna that I am not currently using.
Because I didn’t take the wings off, I wasn’t able to locate a quick disconnect between the wing and fuselage to make wing removal easier in the future. However, I did ensure that I left a large enough service loop and convenient disconnects at the ends of side of the wings to allow me to add these in the future if the wings are removed.
All said and done, I think the upgrade came together nicely. There are still some gunked up spots on the wing tips from removing the old, larger light assemblies, but I’ll clean this up better in the future. The new lights are definitely brighter and draw just short of 5A peak current, and the intercom noise is significantly reduced. Now, the strobes are only slightly audible when on, but for the most part they can be tuned away with the squelch setting.


Shortly after these upgrades, I had an alternator issue in flight. Part way through a sightseeing flight, I noticed my battery was not charging and turned back towards home. Around this time my tachometer also started acting funny, but I wasn’t having any perceptible engine issues. Regardless the alternator issue alone was enough to discontinue the flight and make a precautionary landing before I drained the battery too much.
Because I’m still without a hangar at this point, and because I wasn’t sure what the alternator issue was going to end up being, I opted to take my plane to a local shop for some assistance in troubleshooting. I was able to get an appointment relatively quickly. It was only a short flight over to the shop, so I charged up my battery and was able to make it over without a problem.
It took a few hours of troubleshooting, but we were able to diagnose a couple bad crimps and grounds between the regulator and alternator field wire. After repairing the connections and verifying the regulator still worked, we were able to fix the alternator issue, and I thankfully did not need to replace any expensive parts.
We also tried to troubleshoot the tachometer and thought we identified a couple issues (more wiring problems and a blown fuse), but repairing these unfortunately did not resolve the tach problem. We figured it was most likely the gauge itself that went bad, but since the shop didn’t have the part in stock, I figured it wasn’t worth ordering one to replace it. I will be replacing the entire panel in a couple weeks, so it’s just motivation to get that project finished.
While in the shop, I also had asked about my poor com radio transmit performance. Using their VSWR meter and some replacement RG400, we were able to identify a section of the coax that either had been damaged or had more bad crimps. After replacing that section, the com VSWR measured <=1.40, and on the flight home, tower said the com was much improved.
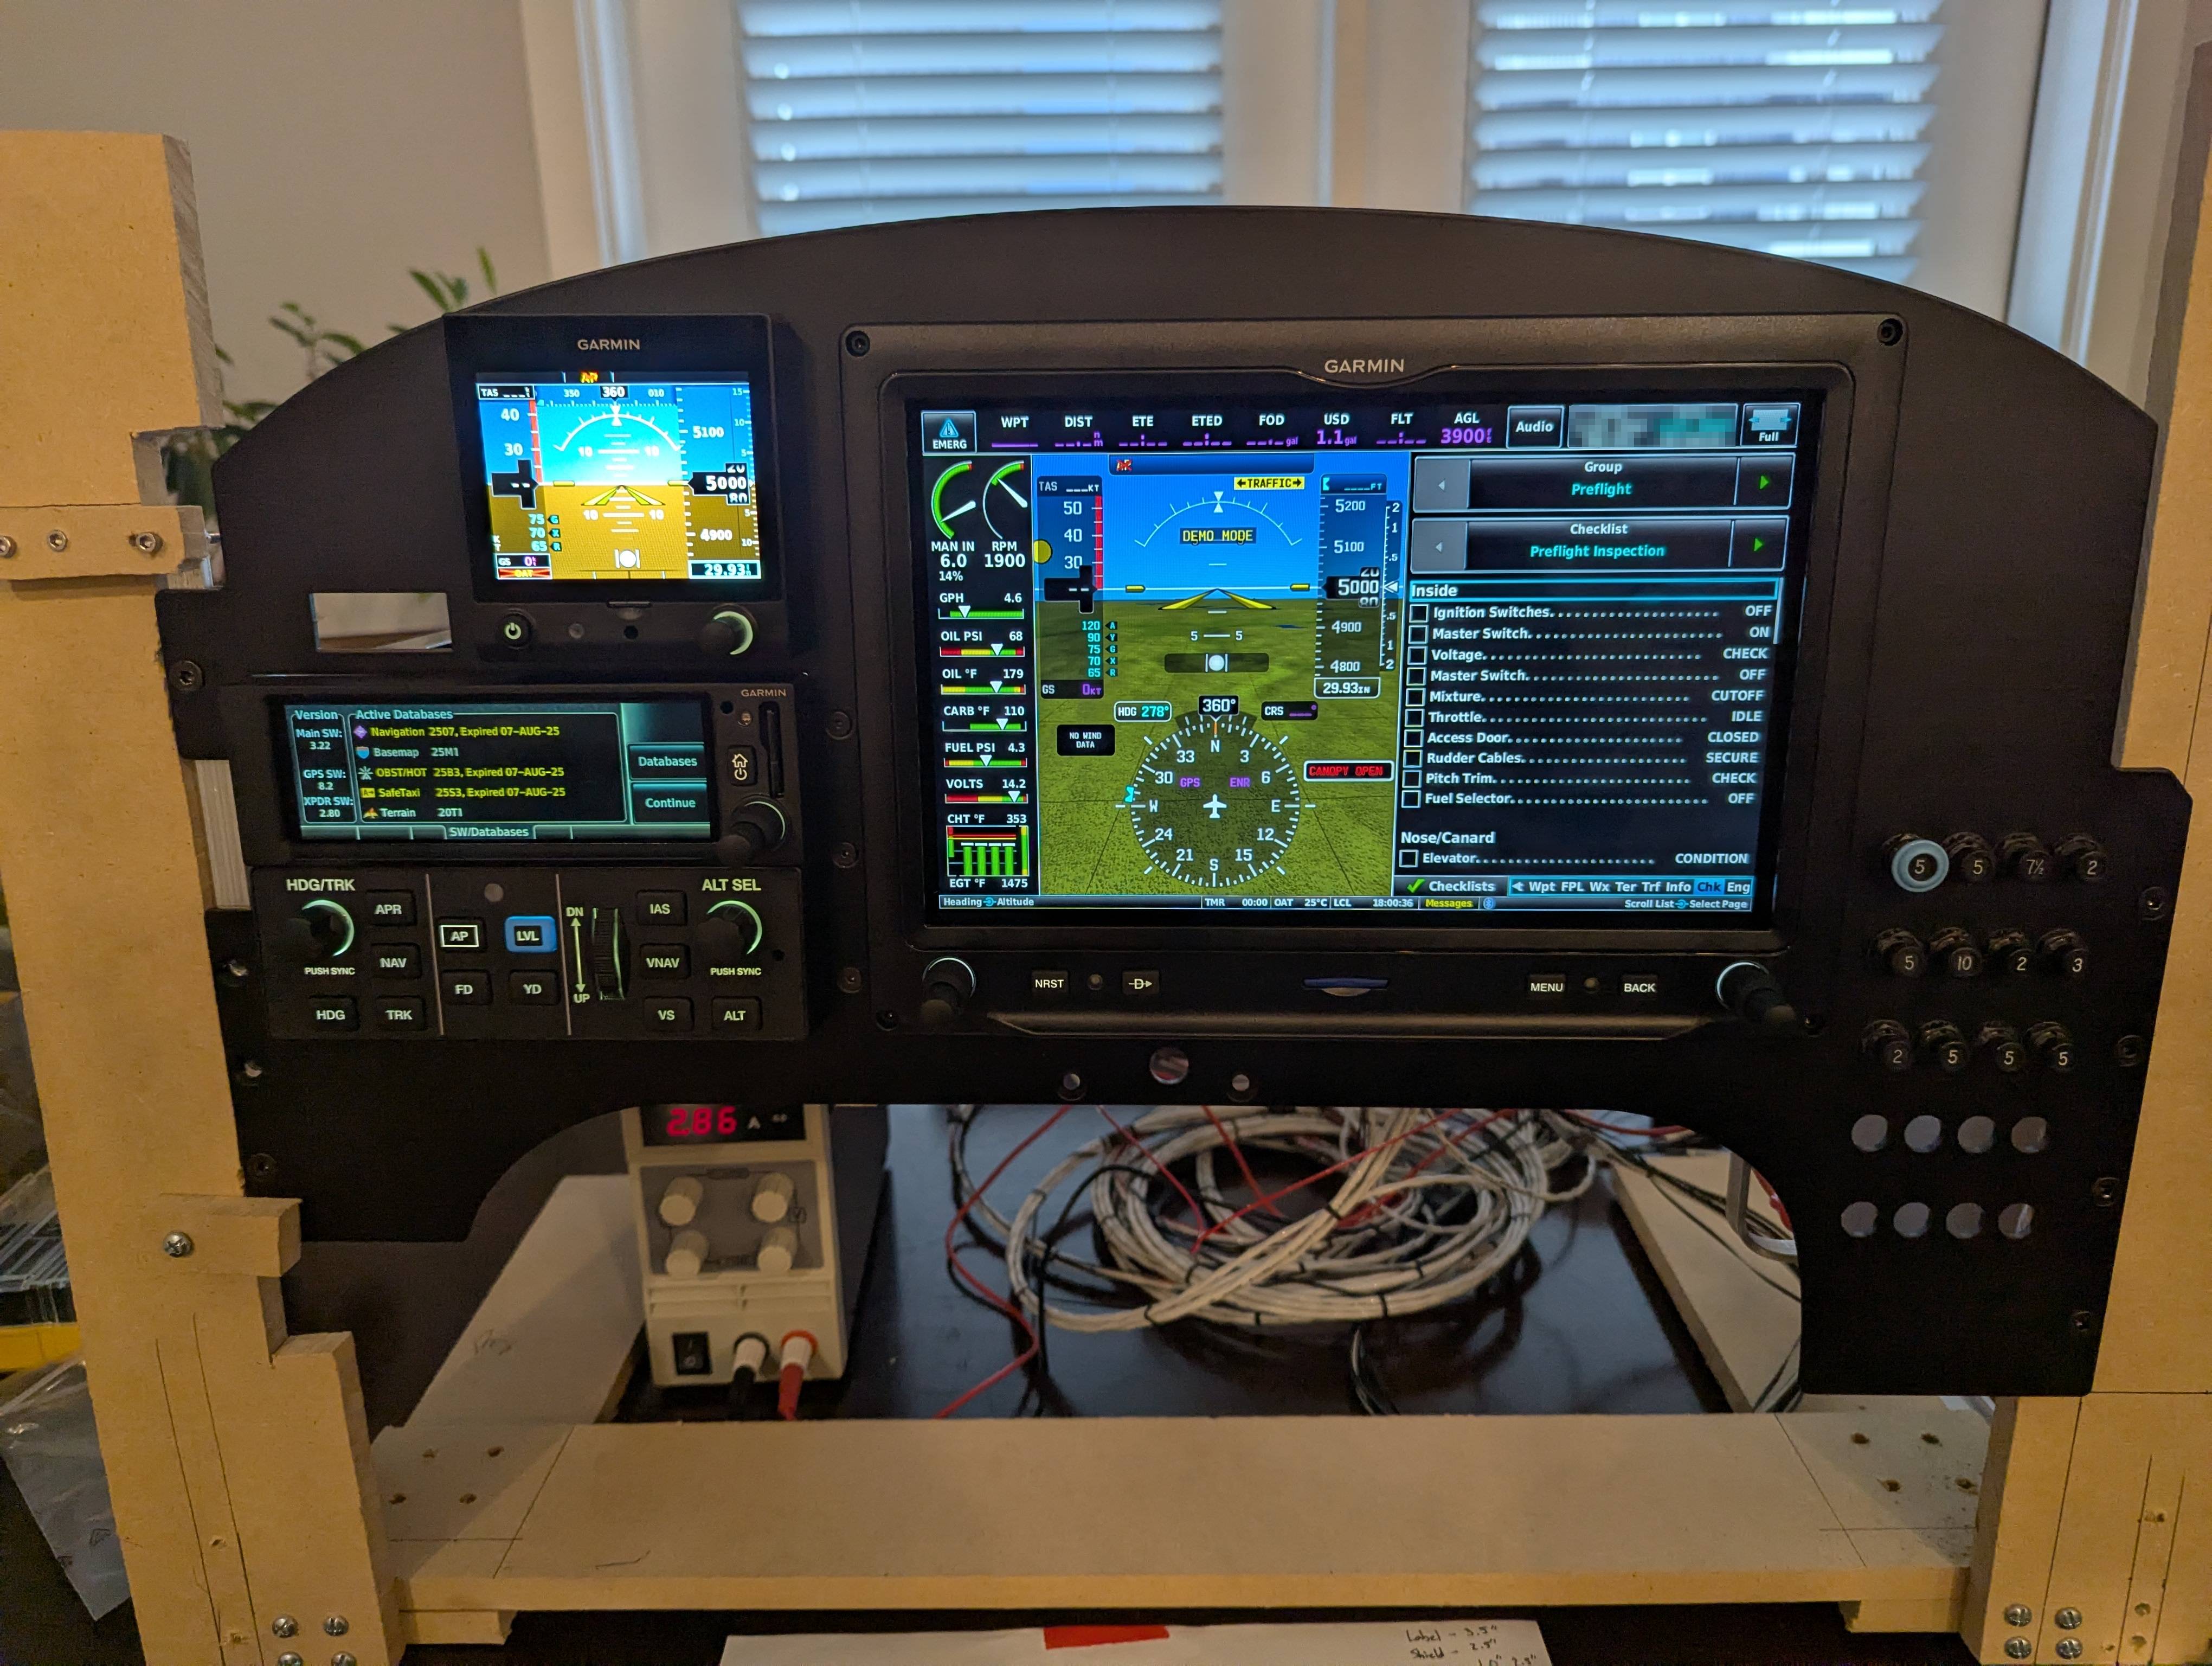
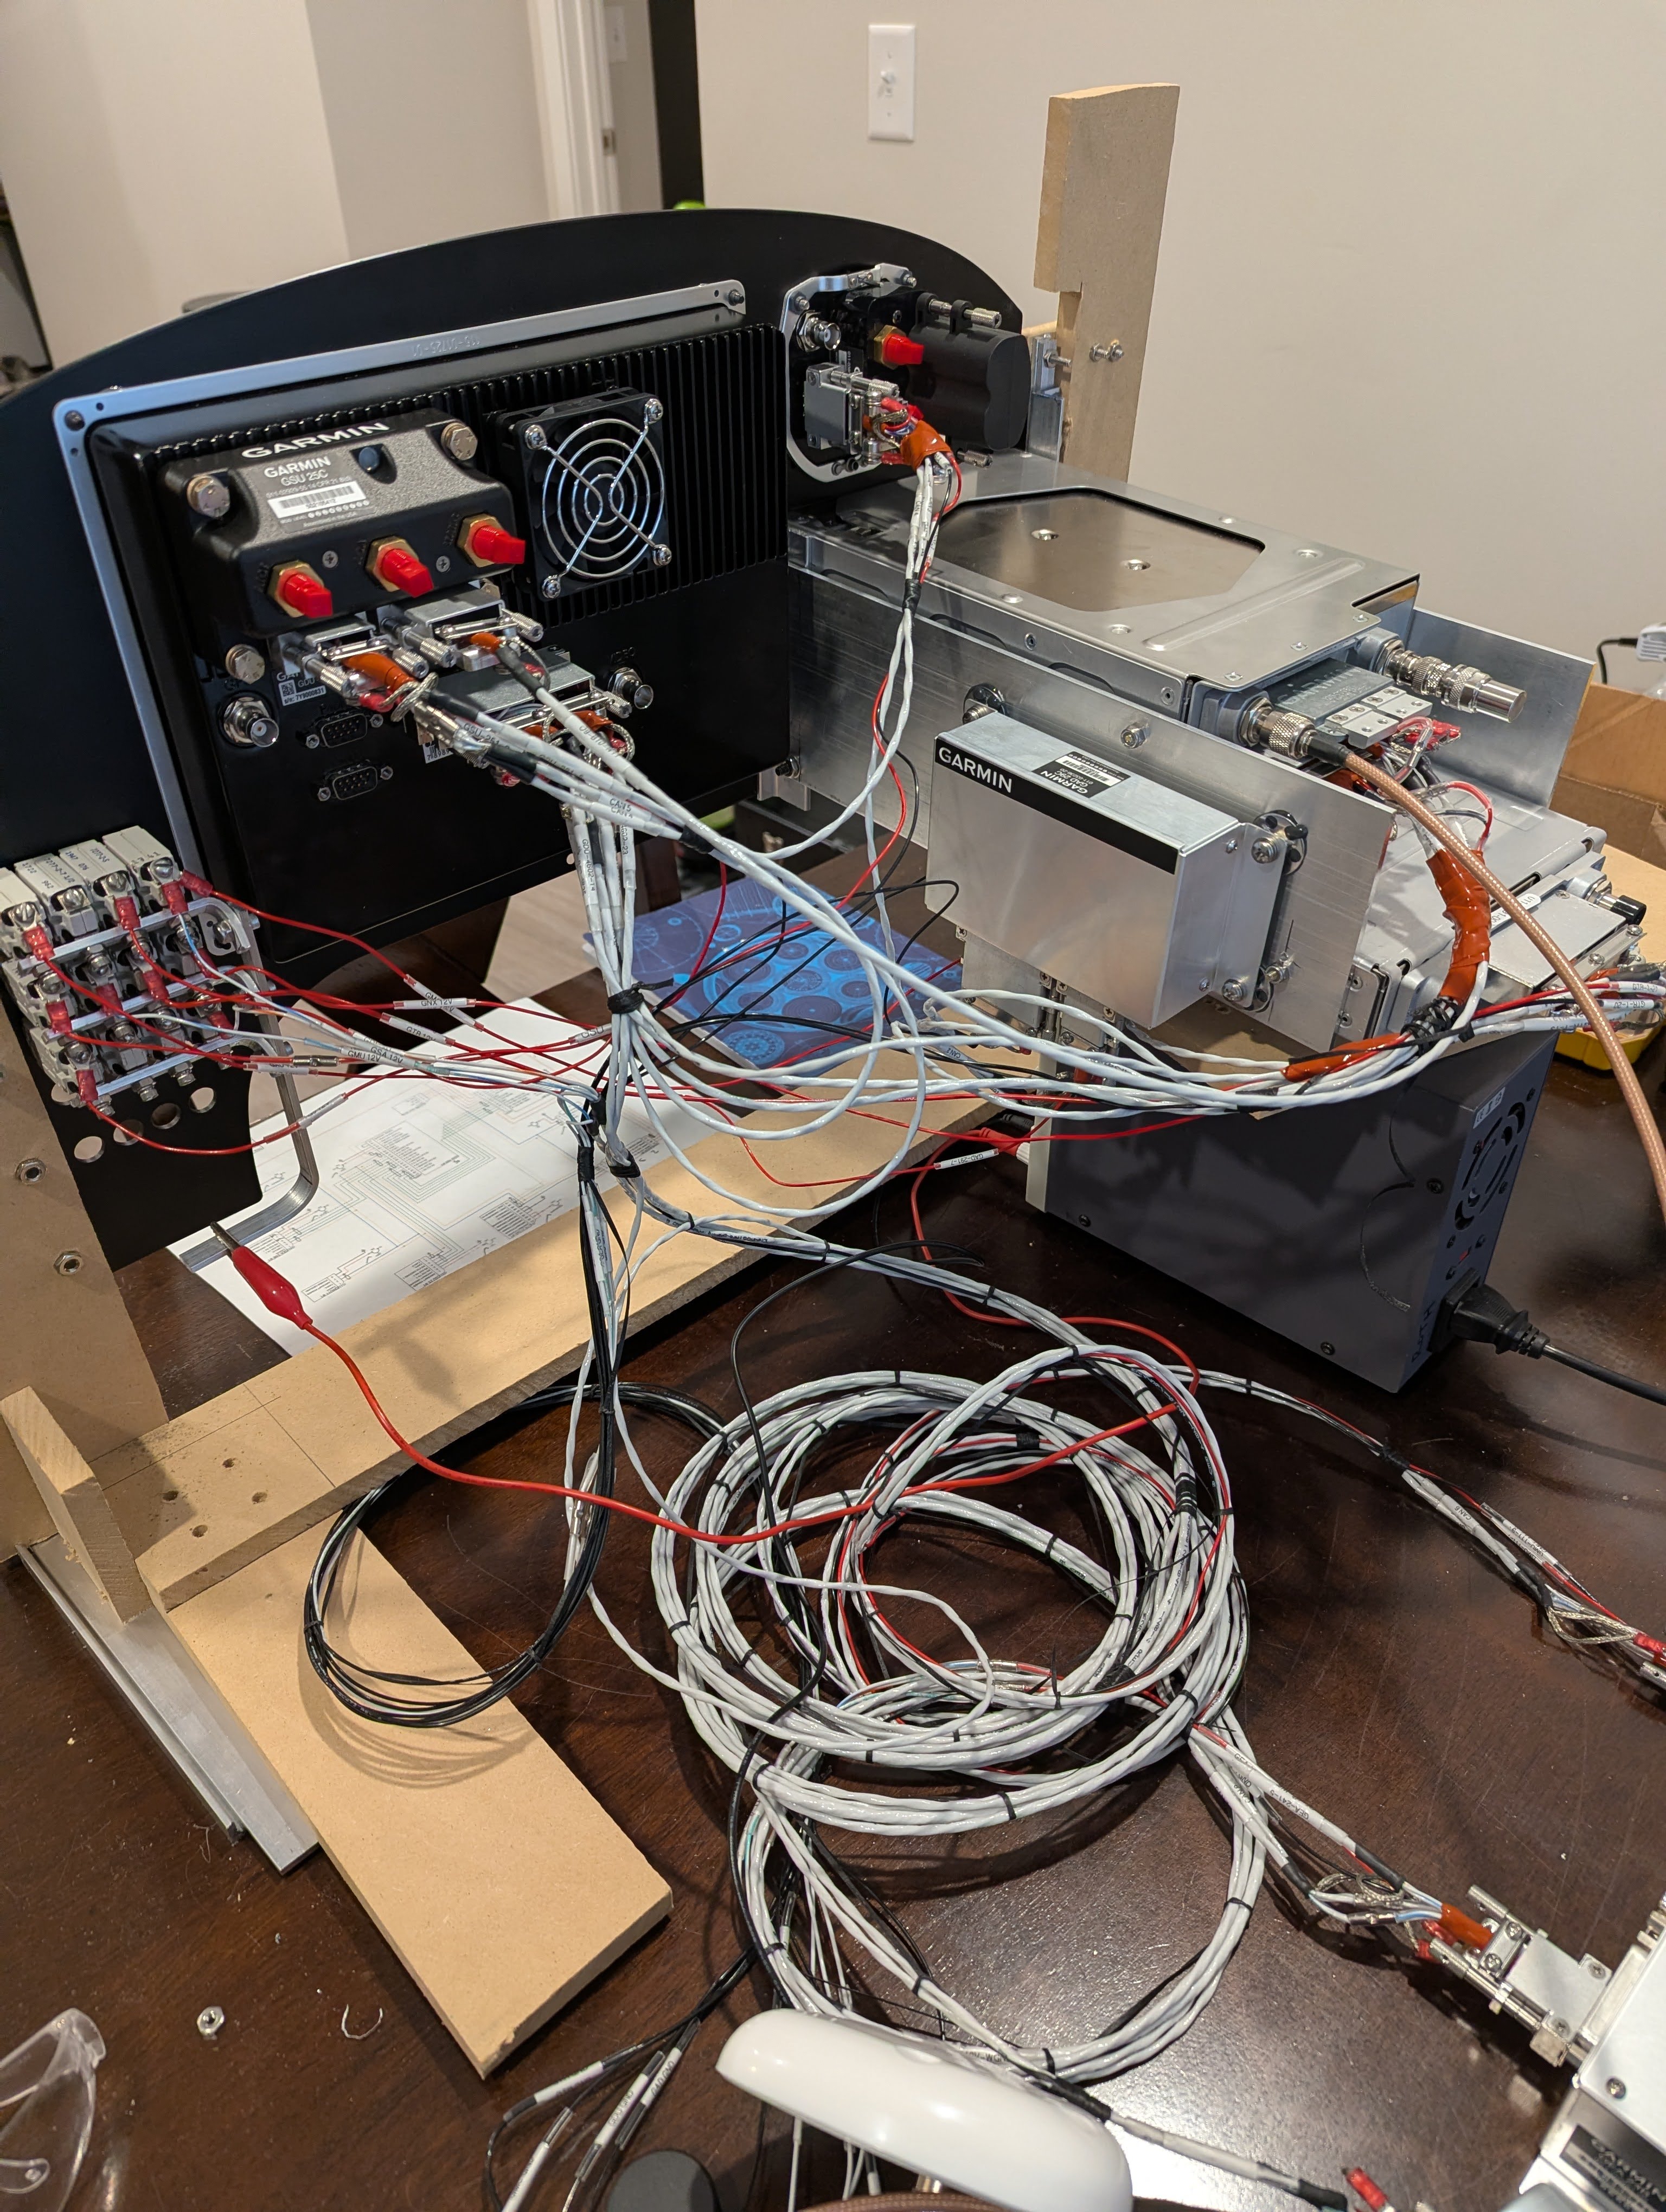
The most recent project is still underway, but I’m making good progress on it. I’ve been working diligently to do a complete panel upgrade to bring my avionics into the 21st century, add digital EIS, and become ADS-B out compliant. So far I’ve completed the wire harness, received the final panel cutout in 1/8” 6061 aluminum, and tested and configured everything on the dining room table.
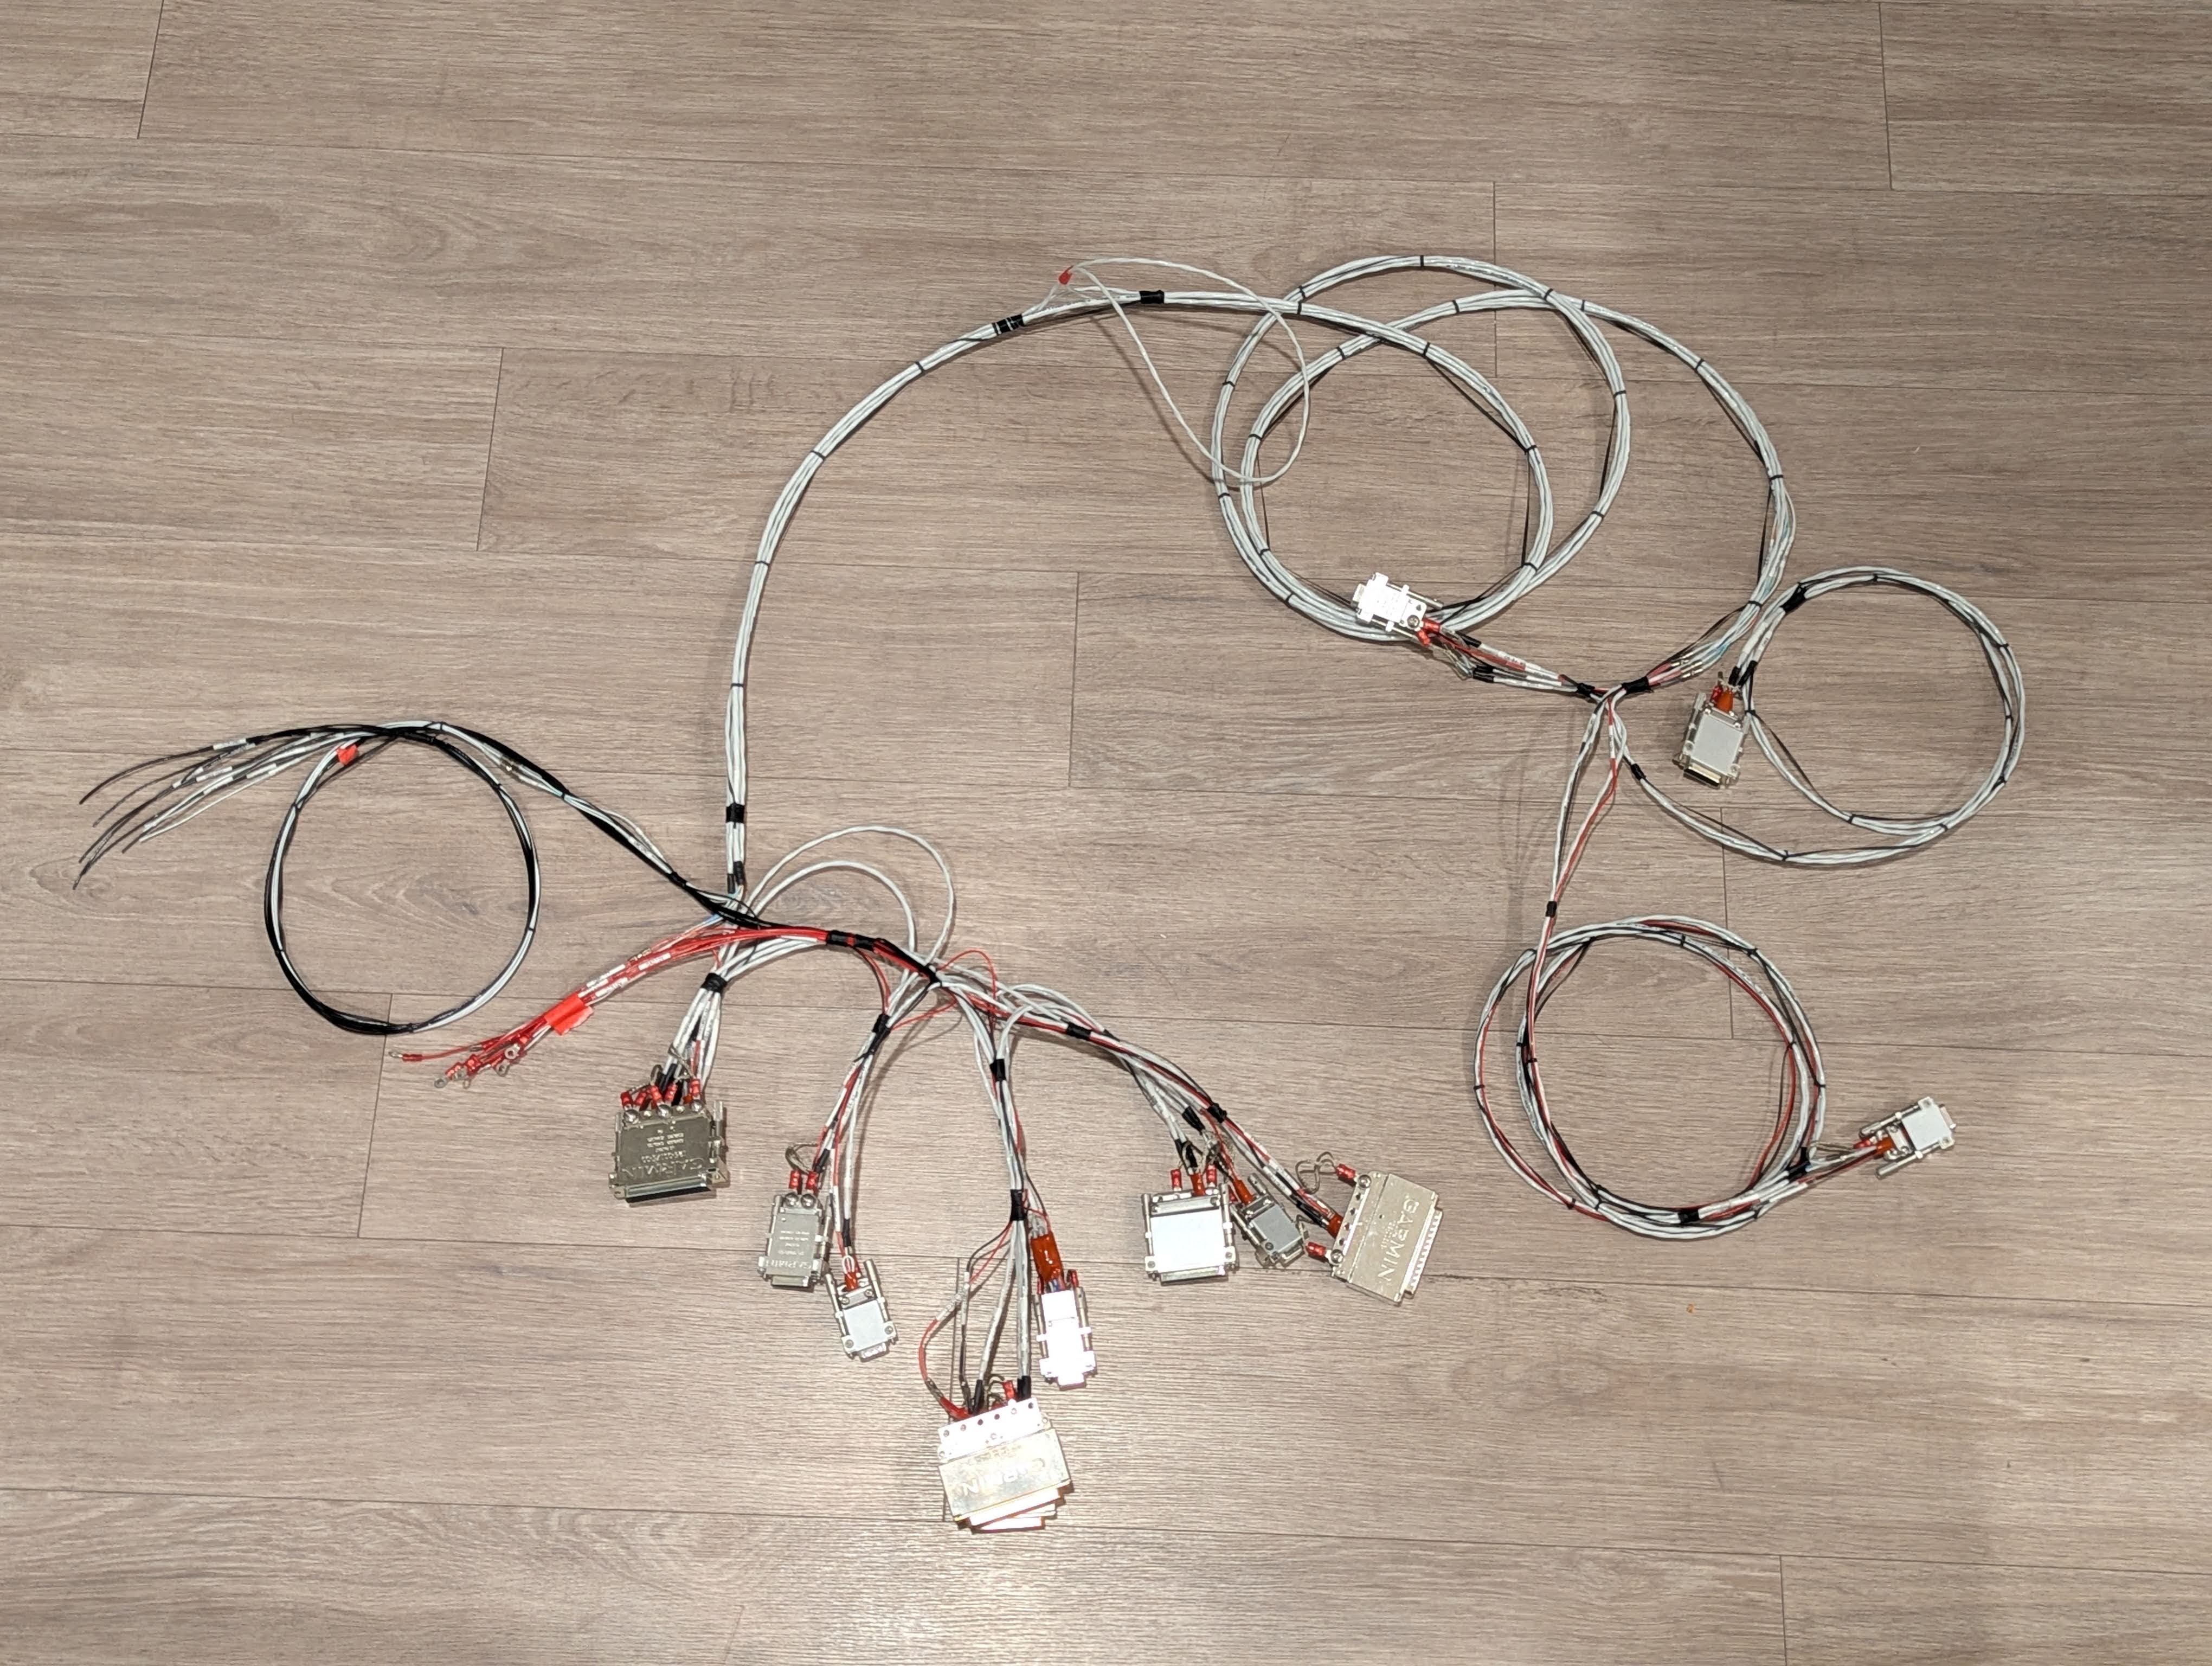
The wire harness definitely isn’t perfect. I ended up with less of a service loop than I’d have liked in a few places, and I think this is because I used the CAD model to make my point-to-point measurements, and I didn’t properly account for the actual path the wires would be taking. Regardless, I’m still happy with it for the most part, and I think I’ll be able to tidy it up without issue once installed into the plane.
I’ve still got a ways to go, but the next steps will be to actually start installing things into the plane. It’ll take me a while to fit the new panel, install the avionics, and run all the new engine sensors, but I’ll be very excited to have the new capabilities and peace of mind that the upgrades will bring. I’ll also have the option to file and fly light IFR if desired since my GNX 375 is a qualified navigator.
My goal is to have everything wrapped up before the end of the year, but I’m also waiting on some temporary hangar space to work out of. While it’s maybe possible, I don’t think it’s going to be feasible for me to get this done before the end of the year by working on the ramp, especially with the colder weather quickly arriving.
Finally, here’s a picture of the panel put together on my dining room table and powered on. Seeing everything operating definitely gives me some extra excitement and motivation to get everything installed and wrapped up. Once the panel upgrade is done, I’ll be ready to start taking this plane on some real trips.